How To Turn On Air Conditioner: A Step-By-Step Guide
To turn on an air conditioner, follow these steps:
1. Locate the power button or switch on the air conditioner.
2. Press or switch on the power button to turn on the unit.
3. Adjust the temperature settings using the thermostat or control panel.
4. Set the fan speed to your preference.
5. Close all windows and doors to ensure efficient cooling.
6. Wait for the air conditioner to cool the room.
Are you tired of sweating through the scorching summer months? Do you find yourself fumbling with the controls of your air conditioner, unsure of how to harness its cooling power? If you’re nodding your head in agreement, then this article is for you. The target audience for our topic, “how to turn on an air conditioner,” includes individuals who are new to using air conditioners or are not familiar with the process.
Whether you’re a first-time AC owner or simply looking to brush up on your knowledge, we’ve got you covered. We understand that staying comfortable in hot weather and maintaining a cool indoor environment is of utmost importance.
That’s why we’ve put together a comprehensive guide to help you master the art of turning on your air conditioner. From troubleshooting common issues to understanding the different settings and controls, we’ll walk you through everything you need to know. So, get ready to say goodbye to sweaty discomfort and hello to a cool, refreshing oasis.
Stick with us as we dive into the world of air conditioning and unlock the secrets to a comfortable, blissful summer. Let’s get started!
- 【WIDE COMPATIBILITY】Our air conditioner window kit is suitable for all air conditioner with external diameter of 5.9”.The AC vent kit has a humanized rail design which is easy to slide the seal plates and fast lock.Adjustable length range of our AC window seal panel can be 16.9”-62.1” which can match vertical and horizontal sliding window and door.
- 【PACKAGE INCLUDED&DIMENSION】NOTICE BEFORE PURCHASE-ADAPTER FOR AC UNIT IS NOT INCLUDED!!! By purchasing our air conditioner window kit you will get 4 window seal panels with length 16.9” which adjustable length range can be 16.9”-62.1”, 1 coupler which can connect panels and exhaust hose with external diameter 5.9”, 1 coupler filter, 4 screws used for fixing, 1 weather stripping with length 138”, 1 exhaust hose with length 59” and external diameter 5.9″.
- 【STRENGTHERN SEALING】Simply Embed the seal panel into the window track and clamp them, also coming with the weather stripping to be posted at the connection between the window and seal panel for strengthening sealing to achieve a good sealing effect, which can keep your room cool at all times, without air-conditioning leakage, preventing hot air from entering, and saving power.
- 【PREMIUM&DURABLE MATERIAL】Our Portable AC window seal kit is made of high-quality PVC and the coupler is made of premium ABS, which anti-extrusion, anti-aging, and can be used year after year. Simple and stable fixing method for install and disassemble easily. Easy to store, and save space
- 【AFTER-SALE SERVICE】We promise to get you covered for any issues that might occur and providing you unconditional return. 24 hours online customer service to get your 100% satisfaction. Please rest assured for purchasing any item from us.
- Only for 5.9”/15cm Diameter Air Conditioner Hose:Please Check Your AC Hose Size Before Buying.
- Free Combination:three longs and one short sliding seal plates suitable for most vertical and horizontal sliding windows. Max adjustable length:130cm/50″.
- Reusable:Made of high-quality PVC, which anti-extrusion, anti-aging, and can be used year after year. Removed and stored space-saving when not in use.
- Strengthen Sealing:This window kit keeps your room cool for longer and save electricity charges. It effectively diffuse the hot air out of the window, preventing warm air circulating in your room meanwhile.
- Package Include:2 x 17.6″ Fixing plate, 1 x 17.6″ Adjustable plate, 1 x 8″ Adjustable plate,1 x 5.9”coupler,1x 13 FT sealing tape, 4 x Butterfly screws,1 x Backup reinforcement screw set.
- Superior Sealing Performance: The portable ac window vent kit features a drawstring cuff design that accommodates 1-6 inch exhaust pipes. The newly engineered air conditioner window seal kit achieves a truly ‘zero-gap’ seal, securely locking in cool indoor air while preventing hot air from entering, along with rainwater and insect intrusion, maintaining a cool and comfortable indoor environment. The special waterproof TU fabric undergoes thermal insulation treatment, efficiently reflecting sunlight for rapid cooling, delivering energy savings and cost efficiency
- Adjustable Universal Size: Air conditioner window kit dimensions (width) 10 x 40-64 inches (length), with adjustable length range 40-64 inches. Suitable for all portable air conditioners and dehumidifiers. Only compatible with horizontal or vertical sliding windows (single-hung and double-hung windows). Sealing strips can be easily trimmed to fit your requirements
- Upgraded for Enhanced Practicality: This design addresses the shortcomings of air conditioner window kits, such as inadequate zipper-style seals, prone-to-rupture zippers causing detachment, and cumbersome installation. Through simplified structural engineering, double-stitched construction, and reinforced Velcro fasteners with wider adhesive tape, it significantly improves adhesion and sealing performance. This enhances window insulation, reduces room cooling time, and delivers genuine durability and practicality
- Easy Installation: Our portable air conditioner window kit includes sealing tape and hook-and-loop fasteners, excludes the exhaust duct, and requires no tools or drilling for straightforward fitting and removal. Thoroughly clean dust from the window frame before application: 1. Open the sliding window and affix the tape to the frame 2. Position the portable air conditioner window seal along the tape 3. Feed the exhaust duct through the circular aperture 4. Tighten the cord fastener and secure the duct using the supplied hook-and-loop straps. Allow 24 hours for settling after installation before use
- Wide Compatibility: The portable air conditioner window kit is suitable for sliding and casement windows (not suitable for sliding windows); compatible with various portable air conditioners, tumble dryers and similar appliances. The portable AC window kit will be an essential item for staying cool this summer, allowing you and your family to enjoy the season’s pleasures
- UNIVERSAL DESIGN – Adapts to most window units (check description below for window requirements).
- INDOOR INSTALLATION – Easy breezy install, without exterior work, just drilling into window sill.
- RELIEVES STRESS ON THE WINDOW – Transfers the stress and weight from the window sill and sash to the support and window frame for safety.
- FITS WALL THICKNESS from 2″ to 11″, exclusive built-in bubble level to correct mounting slope position.
- ALL NECESSARY HARDWARE INCLUDED and all weather construction. Patent No. US D989611
- Pls Choose 3″, 4″ or 5″ Width Components As Your Need: We have 3 kinds of width line cover set, please confirm the part and size are consistent with the full line cover mini split before purchasing
- Rust-proof PE material: Our flexible duct is made of high-quality non-rust PE and safe for temperature -40-140℃, and mini-split line set cover will protect your AC lines for years without fading, cracking, or deforming
- After Sales Service: If you are not satisfied with our mini split line cover, or if there is any inquiry, email to us and we will reply within 24hrs
- This flexible duct is the part accessory for ALL BRAND 4″ line hide for mini split
- Easy Installation& Good appearance: Our mini split cover is very convenient and easy to install, making your house more neat and beautiful
- ANTI-CLOCKWISE UNIVERSAL FIT: Our AC exhaust hose has an anti-clockwise thread direction so make sure to check this is correct for your AC before purchasing. The diameter of our AC hose is 5.9 inches, the length has two options for 1.5m/59″ and 2m/78.7″ respectively, which means it can fit most portable air conditioners on the market.
- DURABLE & WIDE COMPATIBILITY: The window vent kit for portable AC unit consists of four plates, is made of durable PVC materials, recommended max extend length 162cm/64Inch, light weight, portable, suit for using in home or office.
- EASY TO INSTALL: Just set the plate panels together and slide them to the desired length, and then lock with screws. Attach one side of exhaust hose to the air conditioner hose connector by rotating; Attach another side of hose to the adaptor. Finally insert to the plates.
- GOOD SEALING: There is gap between fixing plate and adjustable plate, because of adjustable plate narrower than fixing plate. So come with dealing tape, it is posted at the connection between the sliding door and the sealing plate, which effectively isolates hot air from entering the room and fixed every plate.
- PACKAGE INCLUDES: 1 x Exhaust Hose (Dia15cm/5.9Inch), 1 x Exhaust Hose Adaptor, 2 x 43cm/17Inch Fixing Outer Plates, 2 x 43cm/17Inch Adjustable Inner Plates, 3 x Screws, 1 x Sealing Tapes, please check your sliding door size before buying. If you have any problems, please feel free to contact us.
- ❄️【Strengthen sealing】:This window kit keeps your room cool for longer and save electricity charges. It effectively diffuse the hot air out of the window, preventing warm air circulating in your room meanwhile.
- ❄️【Reusable】:This Window seal kit is made of high-quality PVC, which anti-extrusion, anti-aging, and can be used year after year. Removed and stored space-saving when not in use.
- ❄️【Easy to install and disassemble】:Our window slide kit plate for portable air conditioner adopted novel design, no additional tools needed, very easy to set up and detach to restore, Besides, the installation video is attached, no worry about installation.
- ❄️【Adjustable lenth】:It is suitable for most vertical and horizontal sliding windows and can be freely stretched and adjusted in length. Maximum adjustable length:160cm/63″
- ❄️【Package Include】:2x43cm/17″ Fixing Plate, 2x43cm/17″ Adjustable Plate, 1x 5.9”coupler filter,1 x Exhaust Hose Adaptor(15cm/5.9″),1 x 5.9″ Exhaust Hose – 59 Inch Length Exhaust Hose, 1x 10 FT Sealing Tape, 3x Screws.Please Check Your Window Size Before Buying.
- High-Quality Material: Our exhaust hose connector kit is made of ABS material, Durable and flexible, you can be used for a long time.
- Easy to Use: Two-step connection, the first step, is connected to the exhaust hose, and the second step can be easily installed at the back exhaust port of the portable air conditioner. No need for tools and drilling, simple operation, convenient and practical.
- Fits Most 5.9″Hoses: SunDiao square connector set is suitable for many portable 5.9″ Air Conditioner units. Fits both Clockwise and counterclockwise hoses.
- Package Includes: 1 x 5.9″ Exhaust Hose Adapter
- 100% Satisfaction Guarantee: We are more willing to pursue the quality of the product, if you have any questions, please feel free to contact us, we will reply as soon as possible, give you an optimal solution and appreciate all your comments and opinions.
- Bracket For AC Window Unit – The AC bracke support up to 180 lbs for 12000 to 24000 btu AC units (check description below for window requirements and Product Guides) For installation support, download the User Instructions or contact us first.
- Double Support – Dual Window ac bracket relieves stress on the window sill, eliminates exterior work. Note: Support feet may feature minor design variations (e.g., added opening rectangular gap) in newer batches. All versions meet identical performance and safety standards.
- Indoor Installation & High density reliable material- The ac brackets for windows made of heavy-gauge, epoxy-coated steel, and It’s easy breezy install, adjustable cross bar, only drilling at window sill.
- Troubleshooting-1.Verify all parts against the checklist in the User Instructions. 2. Window Installation Requirements:Window sill thickness ≤ 16 inches (≈40.6 cm). Window sill depth ≥ 2 inches (≈5.1 cm) for base placement. Window sill must accommodate 2.5 inches (≈6.4 cm) screws. Sliding window lip/stool height ≤ 1.9 inches (≈4.8 cm). Does not work with slider, crank-out or casement windows.
- Exclusive built-in bubble level to correct mounting slope position. All necessary hardware included and all weather construction. Note: Please unlock the feet pad of the bracket leg and turn it over then fix it in the leg again if you found it cannot justly face the wall. US Patent Pending. All Rights Reserved.
- Universal Design: Our ac support bracket for window Designed to fit most of the window A/C units on the market,suitable for solid window stills ,brick ,cement, solid wood.It can also adapt to tilting installation surfaces.United States Patent:US 10295221 B2..
- Strong Quality: The window air conditioner bracket for windows from Heavy duty steel constructed finish with a nice powder coating surface treatment, allows the bracket to survive all weather elements, designed for long term outdoor service.
- Sturdy Structure: Soporte para aire acondicionado de ventana Simple two pieces structure to provide extra strength, light weight and sturdy, max loading capacity 85 lbs, support 5,000 to 10,000 BTU window units.
- Easy Installation: Ac stand Quick installation from the inside of the house,all hardwares included.No drilling of outside wall or siding, just drilling into window sill.
- Wall Thickness: Air conditioner support de ventana fits wall thickness from 2” to 11” ,exclusive built-in bubble level to correct mounting slope position.
Understanding the Basics
Why is it Important to Know How to Turn On an Air Conditioner?
Before we delve into the nitty-gritty of turning on an air conditioner, let’s first understand why it’s crucial to have this knowledge.
During the sweltering summer months, an air conditioner becomes an essential appliance for creating a comfortable indoor environment. Knowing how to properly turn on and operate your AC unit ensures you can beat the heat and enjoy a cool, refreshing oasis at home or in the office.
Without this knowledge, you may struggle to operate your air conditioner efficiently and effectively. You might find yourself fumbling with the controls, unsure of the right settings, or even inadvertently causing damage to your AC unit. By mastering the process of turning on an air conditioner, you can enhance your comfort, prolong the lifespan of your appliance, and even save on energy costs.
The Components of an Air Conditioner
Before we dive into the step-by-step process, let’s familiarize ourselves with the key components that make up an air conditioner. Understanding these components will help demystify the process of turning on your AC unit.
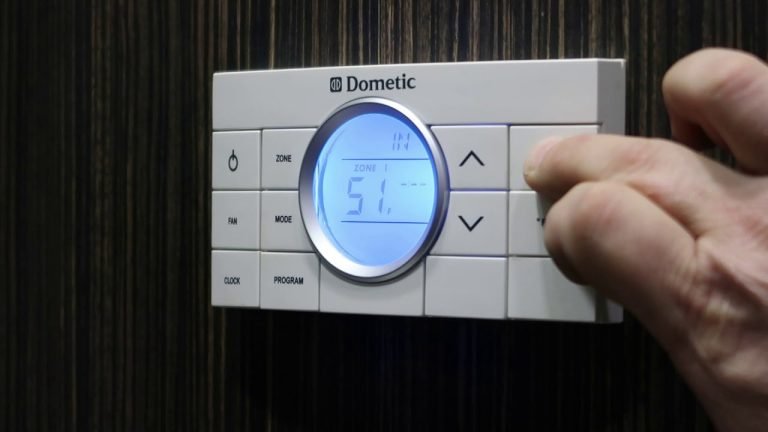
1. Thermostat
The thermostat is the control panel of your air conditioner. It allows you to set the desired temperature and control various settings of the AC unit. Depending on the model, the thermostat can be a simple dial, buttons, or a digital display.
2. Power Button
Most air conditioners have a power button located on the control panel. This button is used to turn the AC unit on and off. It is usually marked with a symbol resembling a power symbol or the letter “P”.
3. Mode Selection
The mode selection allows you to choose the operating mode of your air conditioner. Common modes include cooling, heating, fan-only, and dehumidification. Some AC units also offer additional modes like sleep mode or energy-saving mode.
4. Temperature Control
The temperature control feature enables you to set the desired temperature for your indoor space. You can adjust the temperature according to your comfort level, ensuring the air conditioner maintains the desired coolness.
5. Fan Speed
The fan speed control allows you to adjust the speed at which the AC unit’s fan operates. Most air conditioners offer multiple fan speed options, such as low, medium, and high. Choosing the appropriate fan speed can help circulate the cooled air effectively.
6. Air Direction
Many air conditioners have a feature that allows you to control the direction of the airflow. This feature is especially useful if you want to direct the cool air towards a specific area or avoid direct airflow.
7. Timer
Some advanced air conditioners come equipped with a timer function. This feature allows you to set a specific time for the AC unit to turn on or off automatically. It can be helpful for energy-saving purposes or ensuring your desired temperature is maintained while you’re away.
Gather the Required Information
Before you proceed with turning on your air conditioner, there are a few pieces of information you should gather:
1. AC Unit Manual
Locate the manual that came with your air conditioner. This comprehensive guide provides specific instructions for your particular model and can be a valuable resource when learning how to operate your AC unit.
2. Model and Serial Number
Take note of the model and serial number of your air conditioner. This information can be found on the AC unit itself or in the user manual. Knowing these details can be helpful if you need to troubleshoot any issues or seek technical support.
3. Electricity Source
Ensure that your air conditioner is connected to a reliable electricity source. Check that the power supply is stable, and the AC unit is plugged in properly. If your air conditioner requires batteries for the remote control or other features, make sure they are working and properly installed.
Step-by-Step Guide to Turning On Your Air Conditioner
Step 1: Prepare the Environment
Before you turn on your air conditioner, it’s important to prepare the environment for optimal cooling:
- Close all doors and windows to prevent warm air from entering the room.
- Ensure that the curtains or blinds are closed to block out direct sunlight, which can raise the temperature.
- Remove any obstacles or obstructions around the air conditioning vents to allow proper airflow.
Step 2: Locate the Power Button
Look for the power button on the control panel of your air conditioner. It is typically marked with a power symbol or the letter “P”.
Step 3: Turn On the Air Conditioner
Press the power button to turn on the air conditioner. You should hear a beep or see the display activate, indicating that the AC unit is powered on.
Step 4: Set the Desired Temperature
Use the temperature control feature on the thermostat to set the desired temperature for your indoor space. Turning the control clockwise usually lowers the temperature, while turning it counterclockwise raises the temperature.
Step 5: Select the Operating Mode
Choose the operating mode that suits your needs. If you want to cool the room, select the cooling mode. If you only want to circulate air without cooling, choose the fan-only mode. Refer to your AC unit’s manual for specific instructions on selecting the mode.
Step 6: Adjust the Fan Speed and Air Direction
If desired, adjust the fan speed to your preference. Most air conditioners offer multiple fan speed options, allowing you to customize the airflow. Additionally, you can control the direction of the airflow using the air direction feature.
Step 7: Monitor the Air Conditioner
Once you have set the desired temperature and adjusted the necessary settings, closely monitor the air conditioner for any unusual noises or malfunctions. If you notice any issues, consult the troubleshooting section in your AC unit’s manual or seek professional assistance if needed.
Step 8: Turn Off the Air Conditioner
When you no longer need to use the air conditioner, simply press the power button again to turn it off. This helps conserve energy and prolong the lifespan of your AC unit.
Troubleshooting Common Issues
No Power
If your air conditioner does not turn on, check the power supply. Make sure the AC unit is properly plugged in and that the outlet is functioning correctly. If you are using a remote control, ensure that the batteries are not dead and are correctly installed.
No Cool Air
If your air conditioner is running but not producing cool air, several factors could be at play. Check the thermostat settings to ensure that the desired temperature is set correctly. Additionally, inspect the air filters and vents to make sure they are clean and free from any blockages. If these troubleshooting steps do not resolve the issue, it may be necessary to consult a professional technician.
Unusual Noises
If you hear unusual noises coming from your air conditioner, such as rattling, buzzing, or grinding, it may indicate a mechanical issue. In such cases, it is advisable to turn off the AC unit and seek professional assistance. Continuing to operate the air conditioner with unusual noises could potentially cause further damage.
Mastering the process of turning on an air conditioner is essential for creating a comfortable indoor environment during the hot summer months. By understanding the components of your AC unit, gathering the necessary information, and following a step-by-step guide, you can confidently operate your air conditioner and enjoy a cool, refreshing oasis. Remember to troubleshoot common issues and seek professional assistance when needed. Stay cool and beat the heat with your newfound knowledge of turning on an air conditioner!
How to make air conditioner at home using Plastic Bottle – Easy life hacks
Frequently Asked Questions (FAQ)
How do I turn on my air conditioner?
Why is my air conditioner not turning on?
How can I troubleshoot my air conditioner if it’s not working?
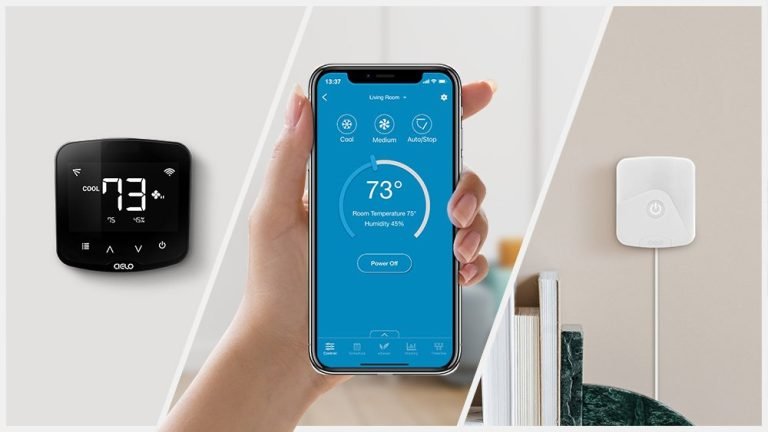
Can I turn on my air conditioner remotely?
How do I turn off my air conditioner?
Final Words: Mastering the Art of Operating Your Air Conditioner
In conclusion, knowing how to turn on an air conditioner is crucial for creating a comfortable indoor environment during hot summer months. By understanding the components of your AC unit and following a step-by-step guide, you can confidently operate your air conditioner and enjoy a cool, refreshing oasis.
The key components of an air conditioner include the thermostat, power button, mode selection, temperature control, fan speed, air direction, and timer. Gathering the required information, such as the AC unit manual, model and serial number, and ensuring a reliable power source, is important before starting the process.
The step-by-step guide to turning on an air conditioner begins with preparing the environment by closing doors and windows, closing curtains or blinds, and removing any obstacles around the vents. Then, locate and press the power button to turn on the air conditioner. Set the desired temperature, select the operating mode, adjust the fan speed and air direction if desired, and closely monitor the AC unit for any issues.
Finally, when you no longer need to use the air conditioner, press the power button to turn it off. Common issues that may arise include no power, no cool air, and unusual noises. Troubleshooting these issues involves checking the power supply, thermostat settings, air filters, and vents.
