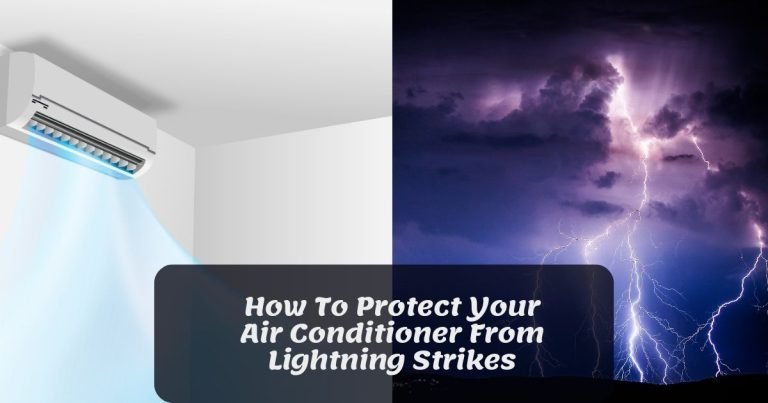
How To Turn On Air Conditioner: A Step-By-Step Guide
To turn on an air conditioner, follow these steps:
1. Locate the power button or switch on the air conditioner.
2. Press or switch on the power button to turn on the unit.
3. Adjust the temperature settings using the thermostat or control panel.
4. Set the fan speed to your preference.
5. Close all windows and doors to ensure efficient cooling.
6. Wait for the air conditioner to cool the room.
Are you tired of sweating through the scorching summer months? Do you find yourself fumbling with the controls of your air conditioner, unsure of how to harness its cooling power? If you’re nodding your head in agreement, then this article is for you. The target audience for our topic, “how to turn on an air conditioner,” includes individuals who are new to using air conditioners or are not familiar with the process.
Whether you’re a first-time AC owner or simply looking to brush up on your knowledge, we’ve got you covered. We understand that staying comfortable in hot weather and maintaining a cool indoor environment is of utmost importance.
That’s why we’ve put together a comprehensive guide to help you master the art of turning on your air conditioner. From troubleshooting common issues to understanding the different settings and controls, we’ll walk you through everything you need to know. So, get ready to say goodbye to sweaty discomfort and hello to a cool, refreshing oasis.
Stick with us as we dive into the world of air conditioning and unlock the secrets to a comfortable, blissful summer. Let’s get started!

- 🔥❄️❄【Good sealing】:This window kit keeps your room cool for longer and save electricity charges. It effectively diffuse the hot air out of the window, preventing warm air circulating in your room meanwhile.
- ❄️❄【Reusable】:This window sealing kit is made of PVC, which does not deteriorate easily and can be used year after year.
- ❄️❄【Easy to install and disassemble】:Fits for sliding window or sliding door, Embed the plates into the window track and supplement with window seal strip to achieve a good sealing effect.
- ❄️❄【Adjustable lenth】:It is suitable for most vertical and horizontal sliding windows and can be freely stretched and adjusted in length. Maximum adjustable length:157.5cm/62″ .
- 【Package Include】:2x43cm/16.93″ Fixing Plate, 2x43cm/16.93″ Adjustable Plate,1 x Exhaust Hose (Dia15cm/5.9Inch),1 x Exhaust Hose Adaptor(15cm/5.9″),1 x Sealing Tape, 3x Screws.Please Check Your Window Size Before Buying..

- ❄️【Strengthen sealing】:This window kit keeps your room cool for longer and save electricity charges. It effectively diffuse the hot air out of the window, preventing warm air circulating in your room meanwhile.
- ❄️【Reusable】:This Window seal kit is made of high-quality PVC, which anti-extrusion, anti-aging, and can be used year after year. Removed and stored space-saving when not in use.
- ❄️【Easy to install and disassemble】:Our window slide kit plate for portable air conditioner adopted novel design, no additional tools needed, very easy to set up and detach to restore, Besides, the installation video is attached, no worry about installation.
- ❄️【Adjustable lenth】:It is suitable for most vertical and horizontal sliding windows and can be freely stretched and adjusted in length. Maximum adjustable length:160cm/63″
- ❄️【Package Include】:2x43cm/17″ Fixing Plate, 2x43cm/17″ Adjustable Plate, 1x 5.9”coupler filter,1 x Exhaust Hose Adaptor(15cm/5.9″),1 x 5.9″ Exhaust Hose – 59 Inch Length Exhaust Hose, 1x 10 FT Sealing Tape, 3x Screws.Please Check Your Window Size Before Buying.
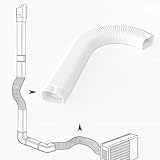
- Pls Choose 3″, 4″ or 5″ Width Components As Your Need: We have 3 kinds of width line cover set, please confirm the part and size are consistent with the full line cover mini split before purchasing
- Rust-proof PE material: Our flexible duct is made of high-quality non-rust PE and safe for temperature -40-140℃, and mini-split line set cover will protect your AC lines for years without fading, cracking, or deforming
- After Sales Service: If you are not satisfied with our mini split line cover, or if there is any inquiry, email to us and we will reply within 24hrs
- This flexible duct is the part accessory for ALL BRAND 4″ line hide for mini split
- Easy Installation& Good appearance: Our mini split cover is very convenient and easy to install, making your house more neat and beautiful

- Humanized Design: rubber cushion using a common design, applicable to any air conditioning unit means,support up to 1000 pounds for all 4 pcs.
- Material: Crafted from natural rubber,scientific design ensures perfect fixing and damping effect under heavy pressure to bear
- Detailed dimensions shown in Figure 3
- Package Description: rubber cushion & galvanized stud and nut set of 4
- Wide range of applications: air conditioning outdoor unit, HVAC, central air conditioning outdoor unit, Air Compressors, and all suitable mechanical devices that require shock absorption and fixing etc etc
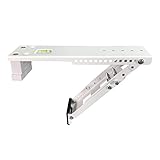
- UNIVERSAL DESIGN – Adapts to most window units (check description below for window requirements).
- INDOOR INSTALLATION – Easy breezy install, without exterior work, just drilling into window sill.
- RELIEVES STRESS ON THE WINDOW – Transfers the stress and weight from the window sill and sash to the support and window frame for safety.
- FITS WALL THICKNESS from 2″ to 11″, exclusive built-in bubble level to correct mounting slope position.
- ALL NECESSARY HARDWARE INCLUDED and all weather construction. Patent No. US D989611

- AC Support: Stay cool in summer months with our ANYMOUNT mounting bracket (12.4″ x 9.4″ x 3.9″) for AC units. Enjoy reliable indoor ac unit support up to 10,000 BTUs or 88 lbs.
- Universal: Our heavy duty shelf brackets are a small and medium universal window AC unit fit, mounting easily and conveniently on any surface up to 10.4″ from wall.
- Easy Installation: Install your window ac bracket (1.89 lbs.) easily from the comfort of your own home. Our air conditioner bracket comes with a built-in bubble level indicator for precision.
- Adjustable Height: Enjoy an adjustable arm height (4.5″ – 6.6″) when installing your air conditioner window unit with our ac mounting bracket. No hassle, and accommodating of your installation needs!
- Everything Included: All necessary hardware is included in this ANYMOUNT portable air conditioner window kit. Enjoy cool air all summer long with this heavy duty window air conditioner support.
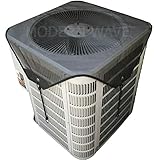
- PREMIUM AIR CONDITIONER COVER – AC cover provides top protection from leaves and branches
- EASY TO USE – Perfectly designed cover has four (4) adjustable bungee cords that attach to the sides of the unit to fit securely over the top
- HIGH QUALITY MESH MATERIAL – Open heavy duty mesh material provides air flow to the unit and helps to reduce moisture inside the air conditioner outdoor unit
- INCREASES AC UNIT LIFE – Cover keeps AC unit free of grass and leaves, prevents rust, minimizes electrical failures
- STANDARD FIT – Durable cover fits most standard-sized AC units. Size 36″ x 36″. Please measure AC before purchase

- ❄️【Adjustable Universal Size】LOVIGA Portable AC Window Seal Kit size in (Width)10×40~64 inch(Length), length is adjustable from 40~64 inch, matching all portable air conditioners and air dryers, fit horizontal or vertical SLIDING WINDOW ONLY (single-hung and double-hung).
- ❄️【Better Sealing】Replacing the old zipper design with a drawstring to allow the sealing fabric to snugly fit around the exhaust hose from 1~6 inch, this newly designed AC Vent Kit has an excellent sealing effect of true “0” gap, firmly lock the indoor cool air while also prevent outdoor heat flowing back, keep out rain, mosquitoes bugs etc. Special waterproof TU fabric with heat-insulating whitening process reflects the sun’s rays efficiently, fast cooling, real energy-saving and money-saving.
- ❄️【More Reliable Design】This Air Conditioner Window Vent Kit is specially designed to solve the problems of zipper type whose sealing is lacking, zipper bursting and easy to slip off, and complicated installation. Simplify the design and structurer while improving the reliability of the product. At the same time, we use solid materials, double-stitched thread and widen the Velcro and tape to further enhance the adhesion and sealing, truly durable and practical.
- ❄️【Easier Installation】 1. open the sliding window about 7.9 inch and put the tape on the window frame 2. put the portable ac window seal along the tape 3. stick the exhaust pipe out of the round hole 4. tighten the cord lock closure and further fix the pipe with the included Velcro ties to complete the installation, no drilling holes, super simple.
- ❄️【Tips & Customer Service】1. Clean off the dust at the window frame before applying the adhesive. 2. It is best to leave it for 24 hours after installation before use. LOVIGA offers Intimate 1-year warranty and 24-hour customer service.

- PACKAGE INCLUDED: 4 pieces window sealing plates, 1 piece 5.9 inch diameter coupler and screw accessaries, sealing foam tapes. Please Check Your Window Size Before Buying. Usually this is not suitable for the sliding door if your door is higher than 62″, Please check.
- PORTABLE AC WINDOW KIT UNIT: KLOLKUTTA window vent kit fits most portable ac units with 5.9 inch diameter exhaust hose. Great for most slide windows, vertical or horizental and windows with adjustable height design.
- VERTICAL & HORIZONTAL USE: The window duct kit is suitable for most vertical and horizontal sliding window. You can use a 2- plates combination, 3-plates combination, or 4-plates combination according to the size of the window. It is convenient to use in any place.
- QUICK INSTALLATION DESIGN: Easy screw the hose to holes in seal plate, adjust seal plates for desired length to fit your window, apply sealing foam tape to window.Easy to store, and save space for your home.
- GREAT SEALING: Come with sealing tapes, which can be posted at the connection between the window side and the sealing plate, which can keep your room cool all times without air-conditioning leakage and saving power.
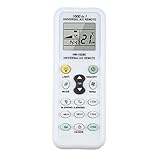
- Universal A/C Air Conditioner LCD Remote Control( NOT for WINDOW / PORTABLE air condition ), more backups at home, Need 2 x AAA batteries (Not Included).There are English manual from the pictures and in the package.
- Control most brands and models of air conditioner, over 1,000 different world famous brands of Air-condtioners, so you can stay cool with a touch of a button while never having to leave the comfort of your couch. Please refer to the applicable brand and code list from the picture.If there is any problem with it, We will provide full support.
- Powerful enough for you to operate in a long distance (Approx 8~10 meters) by this AC Remote Control
- Simple programming with easy to read buttons for control. Comfortable and lightweight design that makes these remotes a perfect air conditioner accessory.
- Digital automatic code searching function. Please pay attention that this remote control is not compatible with WINDOW / PORTABLE air conditioners. It does not compatible with Frigidaire, Mitsubishi, Sharp AF-Q60RX, Sanyo air conditioners.
Understanding the Basics
Why is it Important to Know How to Turn On an Air Conditioner?
Before we delve into the nitty-gritty of turning on an air conditioner, let’s first understand why it’s crucial to have this knowledge.
During the sweltering summer months, an air conditioner becomes an essential appliance for creating a comfortable indoor environment. Knowing how to properly turn on and operate your AC unit ensures you can beat the heat and enjoy a cool, refreshing oasis at home or in the office.
Without this knowledge, you may struggle to operate your air conditioner efficiently and effectively. You might find yourself fumbling with the controls, unsure of the right settings, or even inadvertently causing damage to your AC unit. By mastering the process of turning on an air conditioner, you can enhance your comfort, prolong the lifespan of your appliance, and even save on energy costs.
The Components of an Air Conditioner
Before we dive into the step-by-step process, let’s familiarize ourselves with the key components that make up an air conditioner. Understanding these components will help demystify the process of turning on your AC unit.
1. Thermostat
The thermostat is the control panel of your air conditioner. It allows you to set the desired temperature and control various settings of the AC unit. Depending on the model, the thermostat can be a simple dial, buttons, or a digital display.
2. Power Button
Most air conditioners have a power button located on the control panel. This button is used to turn the AC unit on and off. It is usually marked with a symbol resembling a power symbol or the letter “P”.
3. Mode Selection
The mode selection allows you to choose the operating mode of your air conditioner. Common modes include cooling, heating, fan-only, and dehumidification. Some AC units also offer additional modes like sleep mode or energy-saving mode.
4. Temperature Control
The temperature control feature enables you to set the desired temperature for your indoor space. You can adjust the temperature according to your comfort level, ensuring the air conditioner maintains the desired coolness.
5. Fan Speed
The fan speed control allows you to adjust the speed at which the AC unit’s fan operates. Most air conditioners offer multiple fan speed options, such as low, medium, and high. Choosing the appropriate fan speed can help circulate the cooled air effectively.
6. Air Direction
Many air conditioners have a feature that allows you to control the direction of the airflow. This feature is especially useful if you want to direct the cool air towards a specific area or avoid direct airflow.
7. Timer
Some advanced air conditioners come equipped with a timer function. This feature allows you to set a specific time for the AC unit to turn on or off automatically. It can be helpful for energy-saving purposes or ensuring your desired temperature is maintained while you’re away.
Gather the Required Information
Before you proceed with turning on your air conditioner, there are a few pieces of information you should gather:
1. AC Unit Manual
Locate the manual that came with your air conditioner. This comprehensive guide provides specific instructions for your particular model and can be a valuable resource when learning how to operate your AC unit.
2. Model and Serial Number
Take note of the model and serial number of your air conditioner. This information can be found on the AC unit itself or in the user manual. Knowing these details can be helpful if you need to troubleshoot any issues or seek technical support.
3. Electricity Source
Ensure that your air conditioner is connected to a reliable electricity source. Check that the power supply is stable, and the AC unit is plugged in properly. If your air conditioner requires batteries for the remote control or other features, make sure they are working and properly installed.
Step-by-Step Guide to Turning On Your Air Conditioner
Step 1: Prepare the Environment
Before you turn on your air conditioner, it’s important to prepare the environment for optimal cooling:
- Close all doors and windows to prevent warm air from entering the room.
- Ensure that the curtains or blinds are closed to block out direct sunlight, which can raise the temperature.
- Remove any obstacles or obstructions around the air conditioning vents to allow proper airflow.
Step 2: Locate the Power Button
Look for the power button on the control panel of your air conditioner. It is typically marked with a power symbol or the letter “P”.
Step 3: Turn On the Air Conditioner
Press the power button to turn on the air conditioner. You should hear a beep or see the display activate, indicating that the AC unit is powered on.
Step 4: Set the Desired Temperature
Use the temperature control feature on the thermostat to set the desired temperature for your indoor space. Turning the control clockwise usually lowers the temperature, while turning it counterclockwise raises the temperature.
Step 5: Select the Operating Mode
Choose the operating mode that suits your needs. If you want to cool the room, select the cooling mode. If you only want to circulate air without cooling, choose the fan-only mode. Refer to your AC unit’s manual for specific instructions on selecting the mode.
Step 6: Adjust the Fan Speed and Air Direction
If desired, adjust the fan speed to your preference. Most air conditioners offer multiple fan speed options, allowing you to customize the airflow. Additionally, you can control the direction of the airflow using the air direction feature.
Step 7: Monitor the Air Conditioner
Once you have set the desired temperature and adjusted the necessary settings, closely monitor the air conditioner for any unusual noises or malfunctions. If you notice any issues, consult the troubleshooting section in your AC unit’s manual or seek professional assistance if needed.
Step 8: Turn Off the Air Conditioner
When you no longer need to use the air conditioner, simply press the power button again to turn it off. This helps conserve energy and prolong the lifespan of your AC unit.
Troubleshooting Common Issues
No Power
If your air conditioner does not turn on, check the power supply. Make sure the AC unit is properly plugged in and that the outlet is functioning correctly. If you are using a remote control, ensure that the batteries are not dead and are correctly installed.
No Cool Air
If your air conditioner is running but not producing cool air, several factors could be at play. Check the thermostat settings to ensure that the desired temperature is set correctly. Additionally, inspect the air filters and vents to make sure they are clean and free from any blockages. If these troubleshooting steps do not resolve the issue, it may be necessary to consult a professional technician.
Unusual Noises
If you hear unusual noises coming from your air conditioner, such as rattling, buzzing, or grinding, it may indicate a mechanical issue. In such cases, it is advisable to turn off the AC unit and seek professional assistance. Continuing to operate the air conditioner with unusual noises could potentially cause further damage.
Mastering the process of turning on an air conditioner is essential for creating a comfortable indoor environment during the hot summer months. By understanding the components of your AC unit, gathering the necessary information, and following a step-by-step guide, you can confidently operate your air conditioner and enjoy a cool, refreshing oasis. Remember to troubleshoot common issues and seek professional assistance when needed. Stay cool and beat the heat with your newfound knowledge of turning on an air conditioner!
How to make air conditioner at home using Plastic Bottle – Easy life hacks
Frequently Asked Questions (FAQ)
How do I turn on my air conditioner?
Why is my air conditioner not turning on?
How can I troubleshoot my air conditioner if it’s not working?
Can I turn on my air conditioner remotely?
How do I turn off my air conditioner?
Final Words: Mastering the Art of Operating Your Air Conditioner
In conclusion, knowing how to turn on an air conditioner is crucial for creating a comfortable indoor environment during hot summer months. By understanding the components of your AC unit and following a step-by-step guide, you can confidently operate your air conditioner and enjoy a cool, refreshing oasis.
The key components of an air conditioner include the thermostat, power button, mode selection, temperature control, fan speed, air direction, and timer. Gathering the required information, such as the AC unit manual, model and serial number, and ensuring a reliable power source, is important before starting the process.
The step-by-step guide to turning on an air conditioner begins with preparing the environment by closing doors and windows, closing curtains or blinds, and removing any obstacles around the vents. Then, locate and press the power button to turn on the air conditioner. Set the desired temperature, select the operating mode, adjust the fan speed and air direction if desired, and closely monitor the AC unit for any issues.
Finally, when you no longer need to use the air conditioner, press the power button to turn it off. Common issues that may arise include no power, no cool air, and unusual noises. Troubleshooting these issues involves checking the power supply, thermostat settings, air filters, and vents.