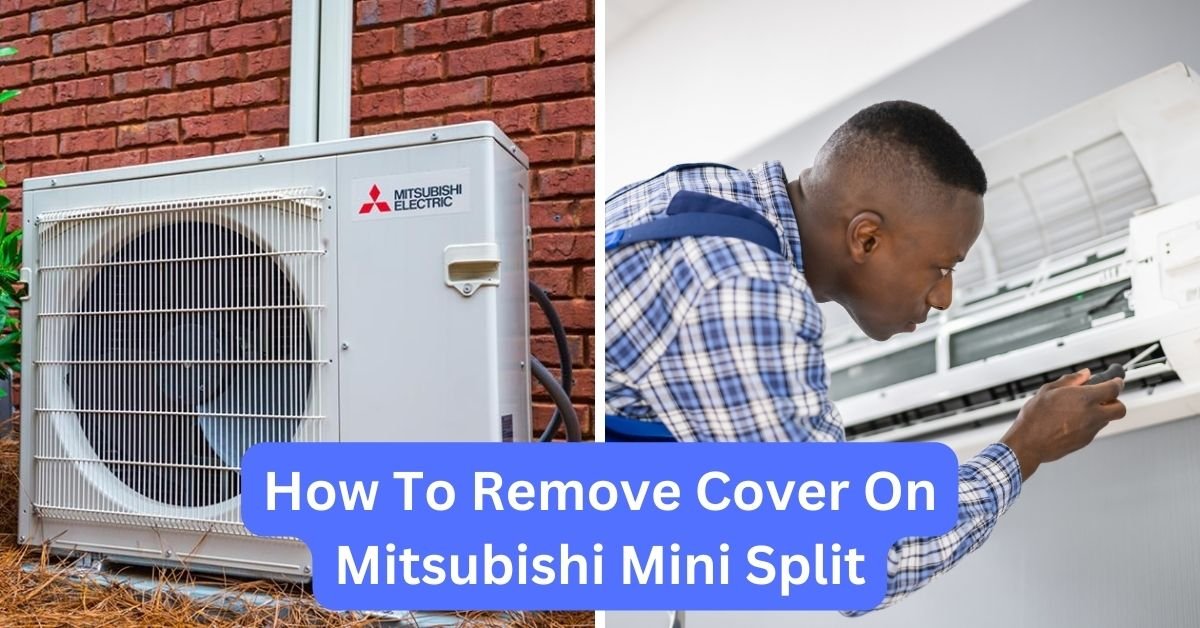
How To Remove Cover On Mitsubishi Mini Split: Easy Steps For Efficient Diy Maintenance
To remove the cover on a Mitsubishi mini split, locate the screws or clips securing the cover in place. Use a screwdriver or release the clips to detach the cover from the unit. Be careful not to damage any components while removing the cover.
Are you a proud owner of a Mitsubishi mini split air conditioning system? Are you looking to maintain it yourself and save on costly repairs? If so, you’ve come to the right place. In this article, we will delve into the essential steps of removing the cover on your Mitsubishi mini split, without causing any damage or compromising its functionality.
For individuals interested in DIY home maintenance, understanding the intricacies of HVAC systems is crucial. And if you are someone who values energy efficiency and wants to optimize the performance of your Mitsubishi mini split, then mastering the skill of removing the cover is a must.
Unlocking the cover of your unit may seem like a daunting task, but fear not. With our expert guidance, you’ll be able to perform this task with ease, ensuring that you can access the components inside the system for cleaning and maintenance purposes. Throughout this article, we will provide you with comprehensive instructions, practical tips, and insider knowledge on how to remove the cover on your Mitsubishi mini split without any hassle.
From locating the screws to safely detaching the cover, we’ll cover it all. So, if you’re ready to become a pro at maintaining your Mitsubishi mini split, let’s dive in and learn the secrets to effortlessly remove the cover, ensuring your unit functions at its best. Get ready to take control of your HVAC system and enjoy the benefits of a well-maintained mini split.
- 18,000 BTU 1.5 Ton Good for Room Size Up to 750 Sq Ft. COOLS & HEATS
- An anti-corrosion treatment applied to the aluminum fins of the heat exchanger of the outdoor unit to protect against corrosion caused by salt, sulfur, and other airborne contaminants, especially in coastal and industrial areas.
- An inverter-driven compressor generates the precise capacity needed to maintain a temperature set point
- Dehumidifying mode & Jet Cool Automatic restart following a power outage
- SEER 18, 220V, 20 AMP Breaker, AUTO restart
- 360 DEGREE WATERPROOF DESIGN – Our ac cleaning kit bag is made with a high-density waterproof fabric to fully cover your Mini Split and prevent water overspray while cleaning with pressurized water and coil cleaners.
- COMPLETE MINI SPLIT CLEANING KIT – The kit includes the waterproof cleaning cover bag, a 9ft drain pipe, 2 plastic side support plates, and a front and 4 rear overspray guards.
- EASY TO INSTALL – The Cleaning Cover Kit installs easily. 1) Attach and position the left and right plastic support plates on the cleaning cover. 2) Spread the cleaning cover onto the air conditioner. 3) Attach the front and rear overspray guards. 4) Attach the drain pipe.
- REUSABLE DURABILITY – Our air condition cleaning bag cover is made from durable double layer waterproof fabric and can be used many times. It is suitable for DIY as well as professional use.
- AVAILABLE IN 2 SIZES FOR MAXIMUM COMPATIBILITY – The small version of our split ac unit cleaning bag cover is made to fit systems from 9,000 to 12,000 BTU (systems 27” to 35” long). The large version is made to fit systems from 18,000 BTU to 24,000 BTU (systems 38” to 48” long). Measure your system before purchase to confirm compatibility.
- POWERFUL DEEP CLEANING: Effectively removes dust, dirt, grime, and build-up from coils, fans, and fins to restore optimal performance and improve air quality for mini splits, heat pumps, and HVAC systems.
- EASY TO USE, DIY: Designed for homeowners with step-by-step instructions and video tutorials. Features a no-rinse formula, making maintenance simple and hassle-free—no professional needed.
- METAL-SAFE PROTECTION: Includes advanced corrosion inhibitors to protect mini splits, heat pumps, and air conditioners, extending equipment lifespan effectively. Also restores cooling efficiency by optimizing heat transfer.
- MULTI-SYSTEM COMPATIBILITY: Works with air conditioners, mini splits, condensers, and HVAC systems; compatible with Fujitsu, Gree, Haier, Senville, LG, Friedrich, Goodman, Mitsubishi, DirectAir, and others.
- RESIDUE-FREE MAINTENANCE: Water-soluble solution mixes easily (1:3) and leaves no sticky residue while neutralizing odors, delivering professional-grade results for routine upkeep.
- COMPLETE MINI SPLIT COIL CLEANER SOLUTION – This kit has everything you need to deeply clean your ductless mini split air conditioner evaporator coil. Including a patented 360 coverage transparent mini split ac cleaning bag cover, Foam Blaster coil cleaner, Flow Tab drain treatment tablet, industrial duty spray gun, 9” angled spray wand, fan spray nozzle, collapsible bucket, and a 17-piece adapter to garden hose connection kit. Our expanding hose is sold separately.
- CLEAN EASIER, BETTER, DEEPER – Our patented 360 Degree Coverage Cleaning Cover installs easily and will prevent water overspray to surrounding areas. The Mini Split Maintenance Kit allows you to clean your mini split easier and deeper to restore peak efficiency and indoor air quality.
- COMPATIBLE WITH ALL MINI SPLIT SYSTEMS – Our kit is a universal fit for all ductless mini split air conditioners. The Patented 360 Degree Cleaning Cover is adjustable to fit all sizes of mini splits. Also included is our 17-Piece Garden Hose to Faucet adaptor Kit. Virtually any household faucet can be connected to a garden hose using our supplied adapters. This allows you to pressure rinse your mini split evaporator with our Spray Gun and Wand to achieve maximum penetration and cleaning.
- DESIGNED BY AMERICAN HVAC PROFESSIONALS – This kit has been designed for commercial use, durability, and can be reused over and over again when properly cared for. We developed this kit from our many years in the field struggling to find the best way to clean mini split systems without uninstalling them from the wall. This is the same kit that we use in our own maintenance jobs.
- INCLUDED AC COIL CLEANER – The Foam Blaster Aerosol Coil Cleaner penetrates deep into the coil to emulsify dirt and contaminants. After applying the coil cleaner, connect our Spray Gun, Wand, and Adapter Kit to your faucet to pressure rinse even the most stubborn gunk and hard to reach parts of the coil. After cleaning, apply our Flow Tab to your drain pan to keep it clean, and flowing.
- Display in Fahrenheit and Celsius!!!(Pleasepress and hold the △ and ▽ temperature buttons simultaneously for 3 seconds to switch.)
- Compatible with Mitsubishi Electric Mr Slim Air Conditioner MSY-GL18NA-U1 MUY-GL18NA.
- Work right out of box. No programming or pairing required. Simply install in 2xAAA akaline batteries and and it will work directly.
- Engineered with high-quality ABS material and a new-gen smart chip, delivers instant button response and reliable 8m/26ft range coverage. Its 120-degree wide-angle design eliminates positioning constraints, while the ergonomic curved shape ensures comfortable, fatigue-free control for extended daily use.
- Package Content: 1 * Remote Control (Note: 2pcs AAA batteries and manual are not included.)
- 【What You Get】: This set includes one 45-degree R410A adapter and one straight R410A adapter. Designed for R410A air conditioning systems, these compact adapters provide essential connection support for installation, repair, and system maintenance, helping ensure seamless and efficient hose connections.
- 【Sturdy Brass Build with Sealing Ring】: Made from high-quality brass with a built-in elastic sealing ring, this mini split adapter offers strong structural integrity and resilience against environmental stress. It resists moisture, oil, and temperature extremes, helping maintain a tight seal and reducing refrigerant loss during operation.
- 【Practical Design】: This R410A refrigerant adapter converts 5/16″ SAE female ports to 1/4″ SAE male connections. The 45-degree angled interface design improves access to tight spaces, while the knurled nut surface provides better grip, making manual tightening easier and reducing the risk of slippage during installation.
- 【Leakproof & Secure Connection】: Engineered with a secure pin-type ejector design, this air conditioning hose adapter minimizes accidental release of refrigerant when connecting or disconnecting. It maintains system integrity during HVAC service tasks, supporting safer and more efficient maintenance workflows.
- 【Ideal for Mini-Split and HVAC Use】: Compatible with most new R410A ductless mini split systems, HVAC equipment, and refrigeration overhaul scenarios, this adapter is a reliable choice for professional technicians and home climate system DIY users. It supports a range of refrigeration and cooling maintenance applications with consistent performance.
- POWERFUL DEEP CLEANING: Effectively removes dust, dirt, grime, and build-up from coils, fans, and fins to restore optimal performance and improve air quality for mini splits, heat pumps, and HVAC systems.
- EASY TO USE, DIY: Designed for homeowners with step-by-step instructions and video tutorials. Features a no-rinse formula, making maintenance simple and hassle-free—no professional needed.
- METAL-SAFE PROTECTION: Includes advanced corrosion inhibitors to protect mini splits, heat pumps, and air conditioners, extending equipment lifespan effectively. Also restores cooling efficiency by optimizing heat transfer.
- MULTI-SYSTEM COMPATIBILITY: Works with air conditioners, mini splits, condensers, and HVAC systems; compatible with Fujitsu, Gree, Haier, Senville, LG, Friedrich, Goodman, Mitsubishi, DirectAir, and others.
- RESIDUE-FREE MAINTENANCE: Water-soluble solution mixes easily (1:3) and leaves no sticky residue while neutralizing odors, delivering professional-grade results for routine upkeep.
- 【Package Includes】:You will receive 1 straight adapter and 1 45-degree angle adapter, which are specially designed for R410A systems, and can easily achieve a fast and stable connection between air conditioning equipment.
- 【Quality and Safety】:This car R410A adapter is made of high-quality brass alloy, which has high hardness, excellent anti-burst performance, high and low-temperature resistance, and not easy to wear; built-in elastic rubber ring, combined with precision thread design, ensures stable connection and sealing.
- 【Practical Products】:This mini split adapter supports quick conversion between 5/16-inch SAE internal thread and 1/4-inch SAE external thread, and is suitable for equipment such as pressure gauge hose set. The 45-degree angle interface makes it easy to get into narrow spaces; the knurled nut is designed to enhance friction, helping you tighten quickly with one hand.
- 【Leak Proof Design】:This car air conditioning hose adapter adopts a pin-type ejector design to ensure that the air conditioning core tube always maintains good sealing, avoids fluorine leakage and ensures your working safety.
- 【Wide Application】:This R410A adapter is widely used in most new R410A ductless mini split systems, HVAC equipment, and refrigeration overhaul scenarios. It is compatible with home and commercial air conditioners and meets the diverse needs of professional maintenance and DIY users.
- 【R410a Mini Split Adapter Kit】: The mini split vacuum pump kit is perfectly fits most R410A ductless mini-split systems and seamlessly converts 5/16 inch SAE charging-vacuum ports to fit a 1/4 inch SAE gauge-hose set. It is ideal for HVAC, refrigeration services, charging vacuum ports, and other refrigeration equipment.
- 【Practical Design】: The R410a refrigerant hose adapter kit comes with both 45-degree and straight adapters offering flexibility and convenience for various connection needs. The 45-degree adapter coupler nuts are deeply knurled for quick and easy finger-tightening, and the 45° angle on the service port side ensures more accessible and convenient connections.
- 【Sturdy Construction】: Crafted from high-quality brass, this R410a adapter kit is built to last. The robust construction and high-strength materials ensure long-term durability and ease of use. The included R134a hose gaskets, made of rubber, provide a reliable seal, preventing leaks and ensuring a secure connection.
- 【Easy Installation】: The mini split r410a charging vacuum port adapters are designed for quick and secure installation, minimizing the risk of leaks and saving time during maintenance or repairs, making it an essential addition to any HVAC and refrigeration tool kit.
- 【What You Get】: Includes 2 x 45-degree adapters, 2 x straight adapters, 1 x valve core remover, 5 x valve cores, 5 x gaskets, and 5 x thimbles for all your needs.
Understanding the Importance of Removing the Cover
The Role of the Cover in a Mitsubishi Mini Split
Before diving into the process of removing the cover on your Mitsubishi mini split, it’s essential to understand the role it plays in the overall system. The cover acts as a protective barrier, shielding the internal components from dust, debris, and potential damage.
By removing the cover, you gain access to the inner workings of the unit, making it easier to clean, inspect, and perform maintenance tasks. Regularly removing the cover and cleaning the internal components can significantly improve the efficiency and longevity of your Mitsubishi mini split.

The Benefits of Removing the Cover
Removing the cover on your Mitsubishi mini split offers several advantages:
- Improved Performance: Over time, dust and debris can accumulate on the internal components, hindering airflow and reducing the system’s efficiency. By removing the cover and cleaning the unit regularly, you can ensure optimal performance.
- Enhanced Air Quality: The cover acts as a barrier, and if left uncleaned, it can become a breeding ground for mold, bacteria, and allergens. Removing the cover allows you to clean and sanitize the internal components, resulting in better air quality.
- Extended Lifespan: A well-maintained Mitsubishi mini split is more likely to have a longer lifespan. By removing the cover and inspecting the internal components, you can identify any potential issues early on and prevent costly repairs or replacements.
- Cost Savings: Hiring a professional for routine maintenance can be expensive. By learning how to remove the cover and perform basic maintenance tasks yourself, you can save money in the long run.
Preparing for Cover Removal
Gather the Necessary Tools
Before you begin the process of removing the cover, gather the following tools:
- Screwdriver: Depending on the model of your Mitsubishi mini split, you may need either a Phillips head or flathead screwdriver. Check the manufacturer’s manual to determine the type of screwdriver required.
- Ladder or Step Stool: Depending on the height of your mini split unit, you may need a ladder or step stool to safely reach the cover.
- Protective Gloves and Eyewear: It’s always a good idea to protect your hands and eyes while working with any HVAC system.
Turn Off the Power
Prior to attempting to remove the cover, ensure that the power to your Mitsubishi mini split is turned off. This will prevent any potential accidents or electrical shocks.
Locate the power switch or circuit breaker associated with your mini split unit and switch it off. It’s important to double-check that the power is indeed off by testing the system before proceeding.
Removing the Cover
Locating the Screws
The cover of your Mitsubishi mini split is typically held in place by screws. To locate these screws:
- Refer to the manufacturer’s manual to identify the exact location and number of screws.
- Inspect the outer casing of the unit, paying attention to any visible screws or fasteners.
- Some models may have decorative covers or panels that need to be removed first before accessing the screws. Carefully remove these panels to reveal the screws.
Unscrewing the Cover
Once you have located the screws, follow these steps to safely remove the cover:
- Using the appropriate screwdriver, loosen and remove each screw one at a time.
- Place the screws in a safe location, such as a small container or bag, to avoid misplacing them.
- After removing all the screws, gently lift the cover straight up to detach it from the unit.
- Set the cover aside in a clean and secure area, ensuring it won’t get damaged or lost.
Cleaning and Maintenance
With the cover removed, you now have access to the internal components of your Mitsubishi mini split. This is an opportune time to perform some cleaning and maintenance tasks:
- Clean the Filters: Remove the air filters and wash them with mild soap and water. Allow them to dry completely before reinstalling.
- Remove Dust and Debris: Use a soft brush or cloth to gently clean the internal components, removing any accumulated dust or debris.
- Check for Damage: Inspect the components for any signs of damage, such as loose wires or corroded connections. If you notice any issues, consult a professional for further assessment.
- Lubricate Moving Parts: Consult the manufacturer’s manual to determine if any moving parts require lubrication. Apply a small amount of lubricant as instructed.
Reassembling the Cover
After completing the necessary cleaning and maintenance tasks, it’s time to reassemble the cover:
- Ensure that the internal components are dry and free from any moisture before reattaching the cover.
- Align the cover with the unit, ensuring that it fits properly and securely.
- Insert and tighten the screws back into their respective positions using the screwdriver.
- Double-check that all screws are securely tightened, but be careful not to overtighten, as it may damage the cover or the unit.
Powering On Your Mitsubishi Mini Split
With the cover securely reattached, it’s time to power on your Mitsubishi mini split:
- Turn on the power switch or circuit breaker associated with your mini split unit.
- Wait for the system to start up and ensure that it’s functioning properly.
- Test the air conditioning or heating function to verify that the unit is operating as intended.
Removing the cover on your Mitsubishi mini split is a crucial step in maintaining its performance and ensuring its longevity. Regularly cleaning and inspecting the internal components can greatly enhance its efficiency and improve the air quality in your space. By following the step-by-step instructions provided in this article, you can confidently remove the cover and perform basic maintenance tasks on your own. Remember to always prioritize safety by turning off the power before starting any maintenance procedures. Take control of your HVAC system and enjoy the benefits of a well-maintained Mitsubishi mini split.
DIY Mini Split Install – All the Things Nobody Shows You
How do I remove the cover on a Mitsubishi mini split?
Do I need any special tools to remove the cover on a Mitsubishi mini split?
What precautions should I take when removing the cover on a Mitsubishi mini split?
Can I clean the cover of a Mitsubishi mini split?
Is it safe to remove the cover on a Mitsubishi mini split myself?
Conclusion: The Importance and Benefits of Removing the Cover on Your Mitsubishi Mini Split Unit
In conclusion, removing the cover on your Mitsubishi mini split is an important maintenance task that can improve the performance, air quality, and lifespan of your unit. By regularly cleaning and inspecting the internal components, you can ensure optimal efficiency and prevent potential issues.
The benefits of removing the cover include improved performance, enhanced air quality, extended lifespan, and cost savings. By learning how to remove the cover and perform basic maintenance tasks yourself, you can save money on professional services.
Before removing the cover, it is important to gather the necessary tools, such as a screwdriver, ladder or step stool, and protective gloves and eyewear. It is also crucial to turn off the power to the unit to ensure safety. To remove the cover, locate and unscrew the screws holding it in place.
Carefully lift the cover to detach it from the unit, and set it aside in a clean, secure area. With the cover removed, you can clean the filters, remove dust and debris, check for damage, and lubricate moving parts. After completing the cleaning and maintenance tasks, reassemble the cover by aligning it with the unit and tightening the screws.
